Your cart is currently empty!
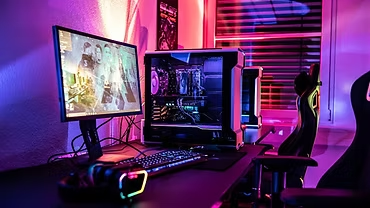
There are few things more frustrating in the digital world than a computer that suddenly freezes. You’re in the middle of an important document, a crucial video call, or an intense gaming session, and then—poof—your screen locks up, the mouse won’t move, and the keyboard is unresponsive. It’s a common issue that can strike any PC, regardless of age, but understanding the primary culprit can help you prevent it.
At AS Computer Solutions here in Onoway, we’ve diagnosed countless freezing issues, and while many factors can contribute, there’s often one top reason we see time and again. Ready to find out what it is and how to fix it? Let’s dive in.
The #1 Culprit: Overheating
That’s right. More often than not, the leading cause of a freezing PC is overheating. Your computer components – especially the processor (CPU) and graphics card (GPU) – generate a lot of heat during operation. If this heat isn’t dissipated efficiently, the components get too hot, and as a protective measure, they start to slow down (a process called “throttling”) or, in severe cases, the entire system will freeze or shut down to prevent permanent damage.
Why Does Overheating Happen?
Several factors contribute to a PC running too hot:
Dust Buildup: This is the most common reason. Over time, dust accumulates inside your computer case, particularly on fans, heat sinks, and ventilation grilles. This acts as an insulating layer, trapping heat and impeding airflow.
Failing Fans: If your CPU fan, case fans, or graphics card fans are failing, making strange noises, or not spinning at their optimal speed, they won’t be able to move enough air to cool the components.
Degraded Thermal Paste: Thermal paste is a compound applied between the CPU/GPU and their respective heat sinks. It helps conduct heat away from the chip. Over years, this paste can dry out or degrade, losing its effectiveness.
Poor Airflow/Ventilation: If your PC case is poorly designed, placed in an enclosed space (like a tight cabinet), or has blocked vents, it won’t be able to draw in cool air and expel hot air effectively.
Overclocking: Pushing your CPU or GPU beyond their factory settings generates more heat than the cooling system might be designed to handle.
Excessive Workload: Running highly demanding applications, multiple programs simultaneously, or intense games for extended periods can push components to their thermal limits.
How to Stop Your PC from Freezing Due to Overheating
The good news is that most overheating issues are preventable and fixable with a bit of maintenance.
✅ Step 1: Clean Your PC Regularly
This is your first and most effective line of defense against overheating.
Dust Everything Out:
What you need: A can of compressed air, anti-static wipes (optional), and patience.
How to do it:
Shut down and unplug your computer completely.
Move it to a well-ventilated area (preferably outdoors or in a garage) to avoid blowing dust back into your living space.
Open your computer case (for desktops). For laptops, focus on the vents.
Using short bursts of compressed air, blast dust out of your fans (CPU fan, case fans, GPU fans). Hold the fan blades gently to prevent them from spinning too fast, which can damage them.
Clean the heat sinks (the metal fins connected to your CPU and GPU).
Clear dust from all ventilation grilles and any other dusty areas inside the case.
Frequency: Aim for a thorough cleaning every 3-6 months, more often if you live in a dusty environment or have pets.
✅ Step 2: Ensure Proper Airflow
Good airflow is crucial for effective cooling.
Clear Obstructions: Make sure nothing is blocking the air intake or exhaust vents of your PC. Don’t place your desktop against a wall, inside a cramped cabinet, or on thick carpet that can block bottom vents.
Laptop Users: Avoid using your laptop on soft surfaces like beds, blankets, or pillows, as these will block the air vents. Consider a laptop cooling pad if you frequently use it on your lap or for demanding tasks.
Case Fans: For desktops, ensure your case fans are correctly installed (intake fans pulling cool air in, exhaust fans pushing hot air out) and are spinning properly. Add more case fans if your case has available mounts and your temperatures are still high.
✅ Step 3: Monitor Your Temperatures
Knowledge is power. Knowing your PC’s temperature can help you catch overheating before it leads to a freeze.
Software Tools: Use free tools like HWMonitor, Speccy, or MSI Afterburner (for GPU) to check your CPU and GPU temperatures.
What to look for:
Idle Temperatures: Should typically be between 30
∘
C and 50
∘
C.
Load Temperatures: Under heavy load (gaming, video editing), aim for below 80
∘
C for CPUs and GPUs. Temperatures consistently above 90
∘
C are a serious concern.
Action: If temperatures are consistently high, especially under normal load, it’s a clear sign you need to address your cooling.
✅ Step 4: Consider Advanced Solutions (If Needed)
If cleaning and airflow improvements aren’t enough, you might need to look deeper.
Replace Thermal Paste: If your PC is several years old and still running hot after cleaning, the thermal paste on your CPU (and possibly GPU) might have dried out. Replacing it with fresh, high-quality thermal paste can significantly improve heat transfer. This is a more advanced task, but many tutorials are available online, or you can bring it to a professional.
Upgrade Cooling: For high-performance PCs or those that still struggle with heat, consider upgrading your CPU cooler (from stock to an aftermarket air cooler or liquid cooler) or installing more efficient case fans.
Underclocking/Undervolting: If you’ve overclocked your components, revert to factory settings. In some cases, undervolting (reducing the voltage to components) can lower temperatures without a significant performance hit.
Mouse or Keyboard Not Working? Try These Quick Fixes Before Calling for Help
Few things are more frustrating than a suddenly unresponsive mouse or keyboard—especially when you’re right in the middle of something important. Whether you’re replying to emails, working on a spreadsheet, or just Browse, losing control of your input devices can grind your entire workflow to a halt.
At AS Computer Solutions here in Onoway, we get calls about this issue all the time. The good news? You might not need a new mouse or keyboard—or even a service call. Most of the time, the fix is quick and simple. So before you panic or start shopping for replacements, try these easy steps first.
✅ Step 1: Rule Out the Basics
Let’s start with the obvious (but often overlooked):
🔄 Reboot Your Computer
It sounds cliché, but a quick restart often clears up temporary bugs or software glitches affecting input devices.
🔌 Check the Connections
For Wired Devices:
Unplug and reconnect the USB cable.
Try a different USB port—especially one directly on the back of your desktop or laptop.
For Wireless Devices:
USB Receiver (Dongle): Make sure it’s securely plugged in. Try another port if needed.
Power Switch: Double-check that it’s turned ON.
Batteries: Swap in fresh batteries—even if the old ones were “just replaced.”
Re-pairing (Bluetooth): You may need to re-sync the device to your computer. Refer to the manual for instructions.
🛠️ Step 2: Targeted Troubleshooting
Depending on what’s acting up, here’s what to do next:
📌 Scenario 1: Only the Mouse or Keyboard Isn’t Working
When one device works but the other doesn’t, it’s likely a fault with the device itself or its connection.
Try This:
Test the device on another computer.
If it works there, your original system may have a driver or port issue.
If it doesn’t, the device might be faulty.
For Windows Users:
Press Windows + X, select Device Manager.
Expand Keyboards or Mice and other pointing devices.
Look for any ⚠️ yellow exclamation marks or ❌ red Xs.
Right-click the affected device and select:
Update driver
Or Uninstall device → then reboot to reinstall it automatically.
For Bluetooth Devices:
Windows: Settings > Bluetooth & Devices → Make sure Bluetooth is on. Remove and re-pair the device.
macOS: System Settings > Bluetooth → Remove and re-add the device.
⚠️ Scenario 2: Neither Mouse nor Keyboard Is Working
This can be tricky since you can’t easily navigate menus.
Try This:
Unplug everything except power and monitor. Restart the system.
Then plug in just the mouse or keyboard one at a time.
Test multiple USB ports—front and back. Try both USB 2.0 and USB 3.0 if available.
Boot into Safe Mode:
On Windows: Hold Shift during restart, or tap F8 repeatedly during boot (older systems).
On Mac: Hold Shift immediately after powering on.
If things work in Safe Mode, a software or driver conflict is likely.
Inspect cables, connectors, and ports for physical damage.
🔄 Scenario 3: Mouse Works, Keyboard Doesn’t (or Vice Versa)
This often indicates a driver issue or hardware failure in the non-working device.
Follow the steps under “Check Device Manager” and test the faulty device on another computer to isolate the issue.
🧰 Still No Luck? Bring It to the Pros
If none of the above fixes do the trick, don’t stress—AS Computer Solutions is here to help.
We can:
Run advanced diagnostics to identify system or driver conflicts
Repair or replace damaged ports or input devices
Check for underlying issues like malware or system corruption
Recommend reliable replacement options that suit your needs
🏡 Local. Reliable. Ready to Help.
Serving Onoway and surrounding communities, AS Computer Solutions is your go-to for friendly, affordable tech support.
Don’t let input issues slow you down. Try the steps above first, and if you’re still stuck, give us a shout. We’ll get your mouse, keyboard—and your productivity—back on track.
Call or visit us today:
📞 (780) 967 0215
📍 Onoway, Alberta
Leave a Reply